5+ Years of Experience

Soft Velvet 3D Wall Sticker

Crafted with a plush velvet texture that feels sleek to the touch, this wall sticker creates a warm, inviting look that adds visual richness and tactile comfort to any space !

Call Us Today:

1-234-Secure90

Providing Worldwide Partners With Superior Wall Sticker Solutions

Ideal For

Importers & distributors

Building material wholesalers

Interior designers & contractors

Project developers & retailers

Let’s Numbers Talk
Years in Business
0 +
Happy Customers
0 +
Licensed Officer
0
Assets Protected
0 K+

3d Velvet Soft Wall Panel Sticker

Ideal for Worldwide Partners

  • Easy to ship & install

  • Cost-effective luxury look

  • Supports OEM / ODM customization

Our Offer

Peel & stick installation — no glue, no nails, no professional tools required. Perfect for DIY and fast projects.Available in various patterns (herringbone, geometric, brick, stripe) and rich color options for different markets!

3D Velvet Herringbone Pattern Series

Size: Size: 0.7×2.9m

Soft luxury + Modern geometry

Premium Velvet Surface

3D Herringbone Geometry

Self-Adhesive, Easy Installation

Sound-Absorbing & Comfort-Enhancing

Lightweight & Wall-Safe

Flexible & Seamless Splicing

Multiple Color Options

Wide Application Scenarios

3D Velvet Brick Pattern Series

Size: 0.69x3m / 20x70cm

Soft luxury + Modern geometry

Premium Velvet Surface

3D Herringbone Geometry

Self-Adhesive, Easy Installation

Sound-Absorbing & Comfort-Enhancing

Lightweight & Wall-Safe

Flexible & Seamless Splicing

Multiple Color Options

Wide Application Scenarios

3D Velvet Narrow Stripe Series

Size: 0.69x3m / 23x77cm

Soft luxury + Modern geometry

Premium Velvet Surface

3D Herringbone Geometry

Self-Adhesive, Easy Installation

Sound-Absorbing & Comfort-Enhancing

Lightweight & Wall-Safe

Flexible & Seamless Splicing

Multiple Color Options

Wide Application Scenarios

3D Velvet Wide Stripe Series

Size: 0.69×2.8m / 23x70cm

Soft luxury + Modern geometry

Premium Velvet Surface

3D Herringbone Geometry

Self-Adhesive, Easy Installation

Sound-Absorbing & Comfort-Enhancing

Lightweight & Wall-Safe

Flexible & Seamless Splicing

Multiple Color Options

Wide Application Scenarios

3D Velvet Diamond Pattern Series

Size: 0.69×2.8m / 35x35cm

Soft luxury + Modern geometry

Premium Velvet Surface

3D Herringbone Geometry

Self-Adhesive, Easy Installation

Sound-Absorbing & Comfort-Enhancing

Lightweight & Wall-Safe

Flexible & Seamless Splicing

Multiple Color Options

Wide Application Scenarios

3D Velvet Abstract Grid Series

Size: 0.69×2.8m / 35x35cm

Soft luxury + Modern geometry

Premium Velvet Surface

3D Herringbone Geometry

Self-Adhesive, Easy Installation

Sound-Absorbing & Comfort-Enhancing

Lightweight & Wall-Safe

Flexible & Seamless Splicing

Multiple Color Options

Wide Application Scenarios

Testimonial

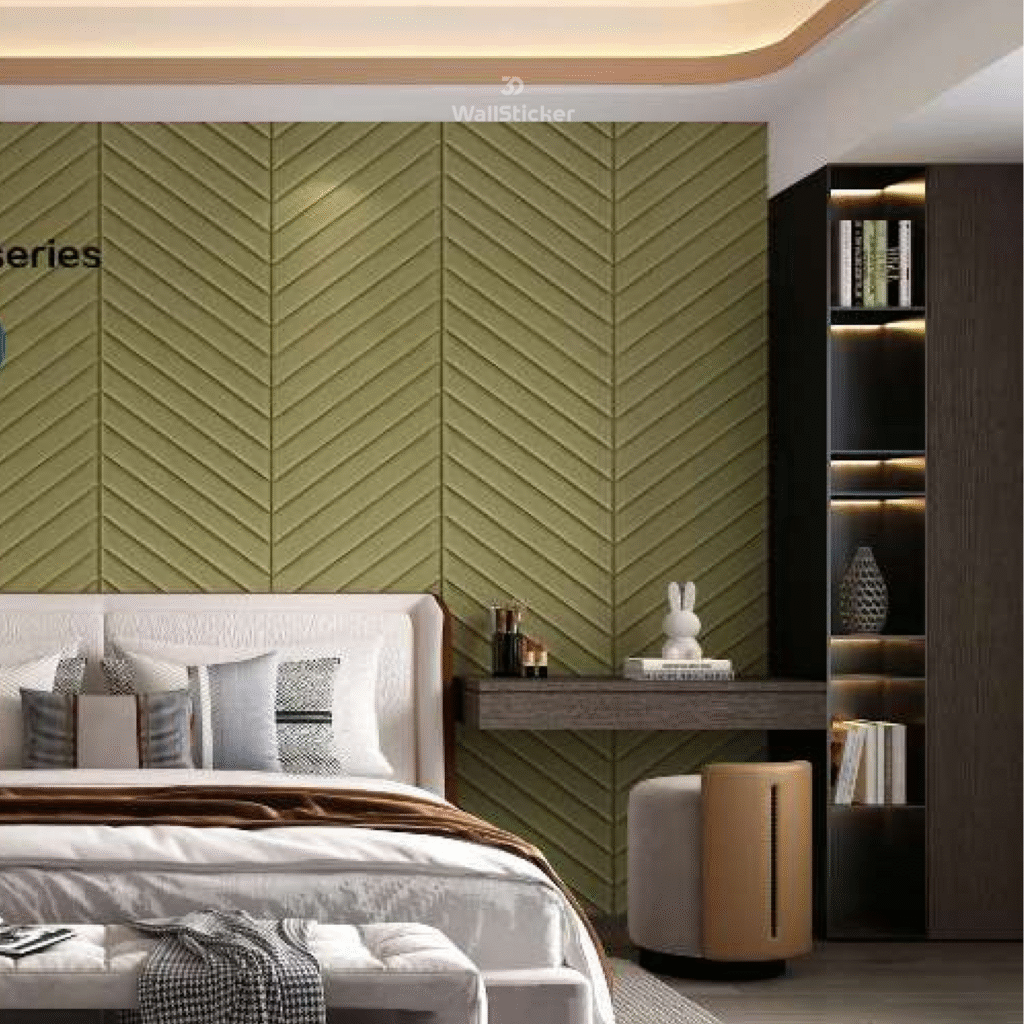
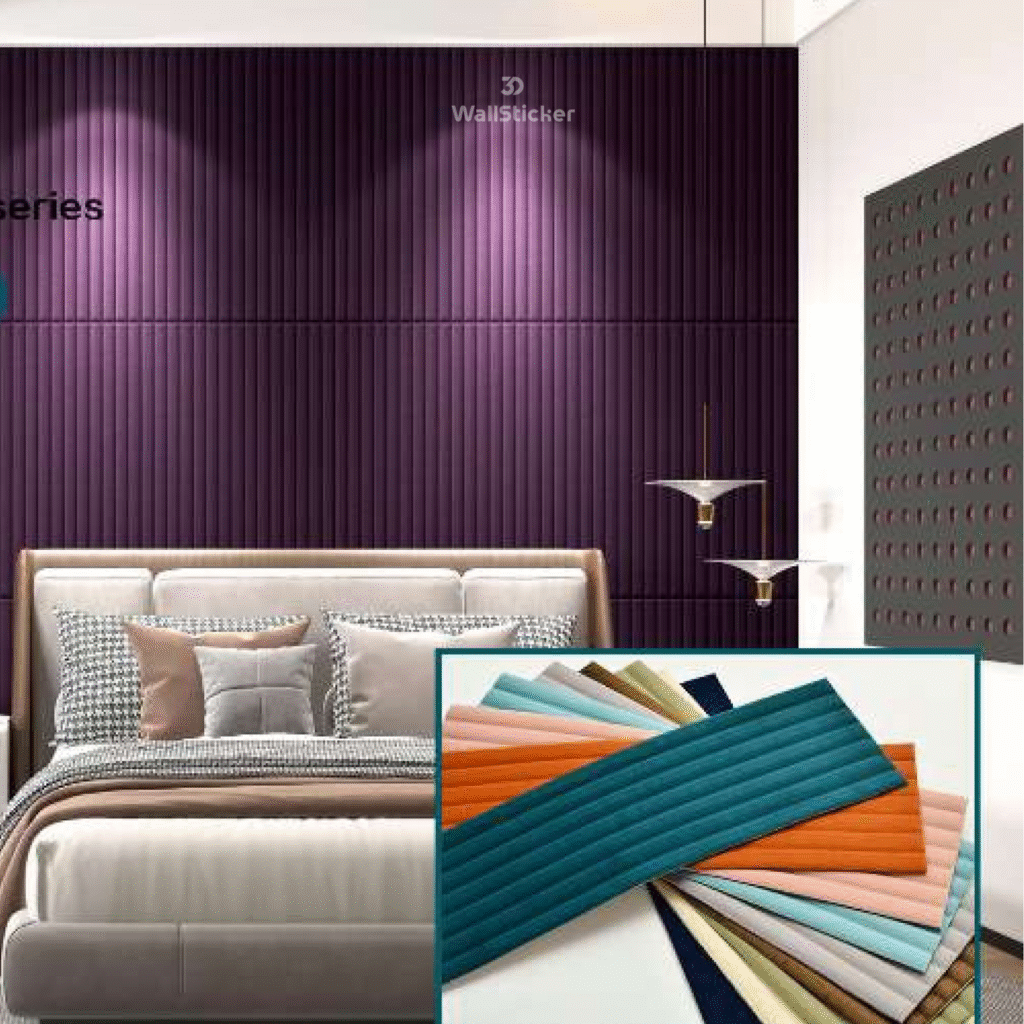
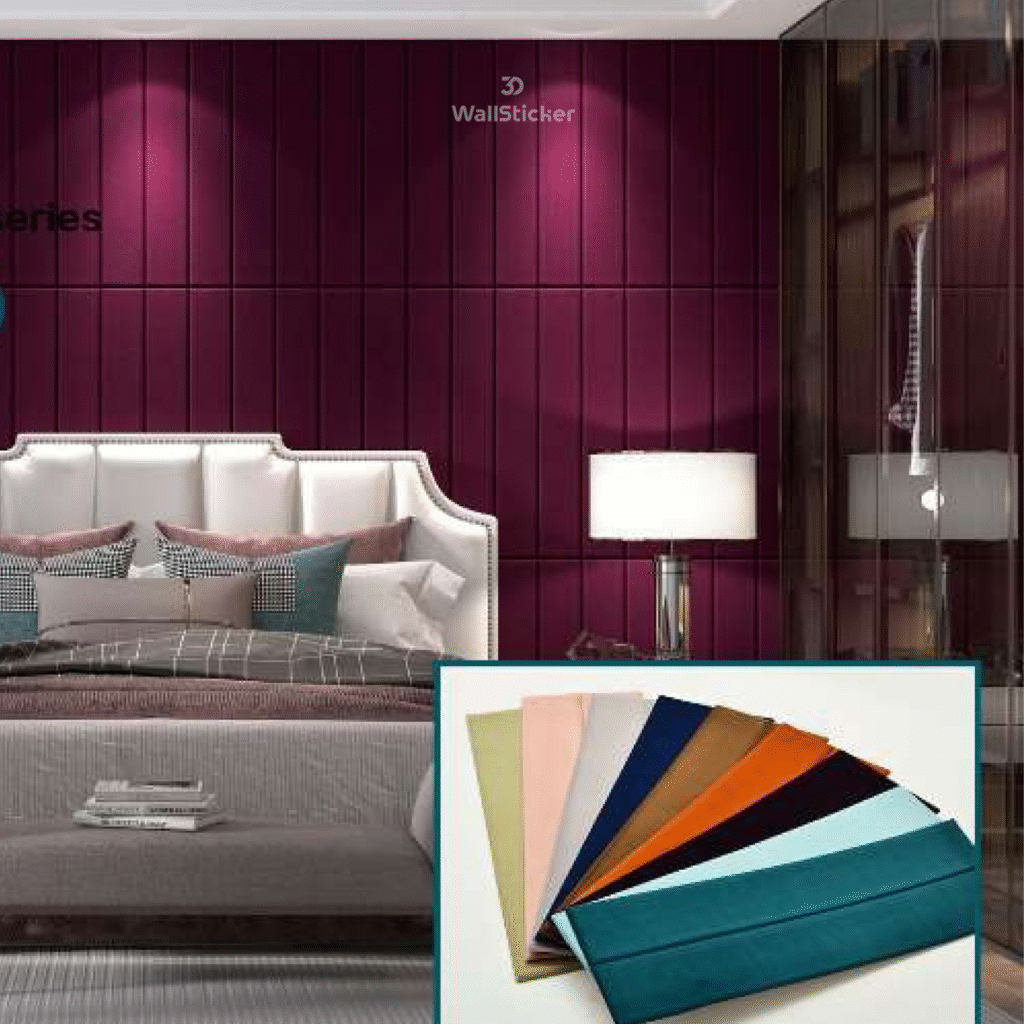
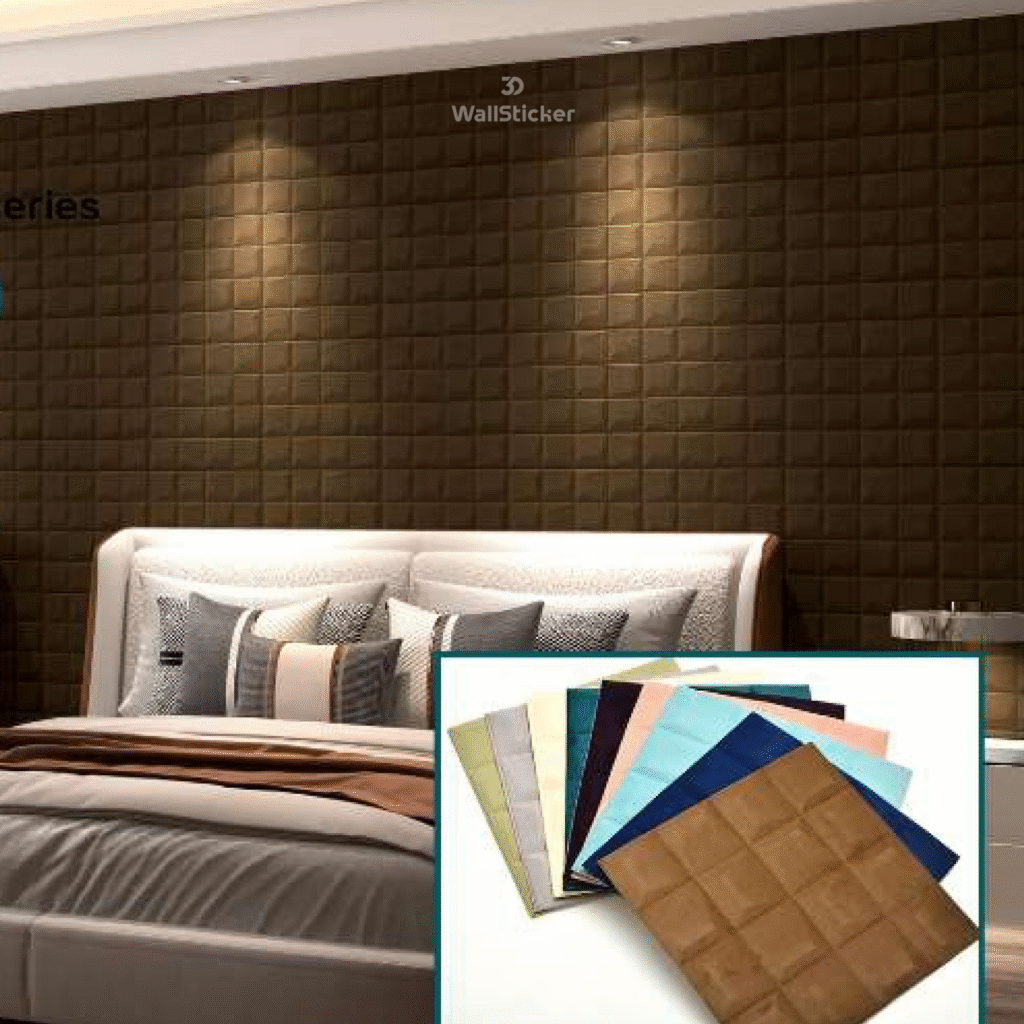
“The 3D velvet wall stickers exceeded our expectations. The texture feels premium, the colors are elegant, and installation is very easy. Our clients love the soft, luxury look, especially for bedrooms and feature walls.”
Europe (Interior Distributor)
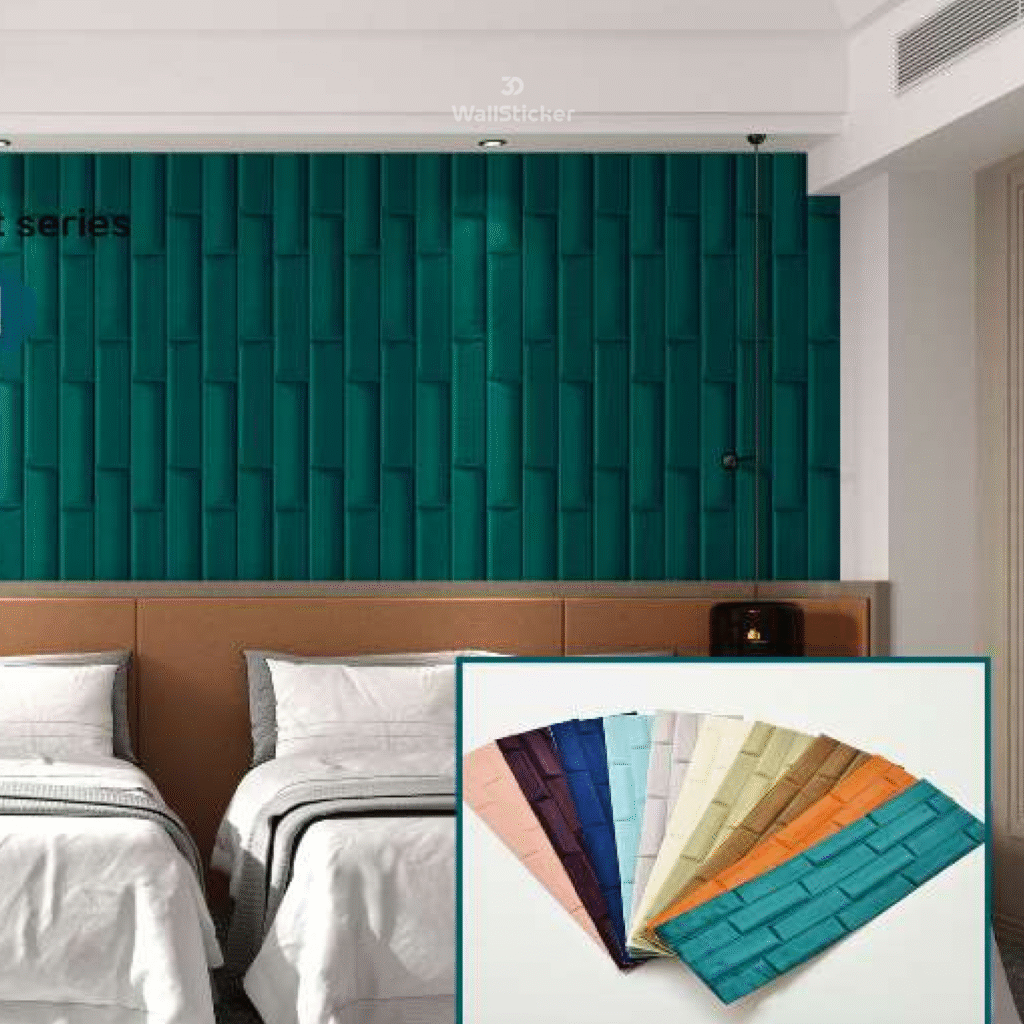
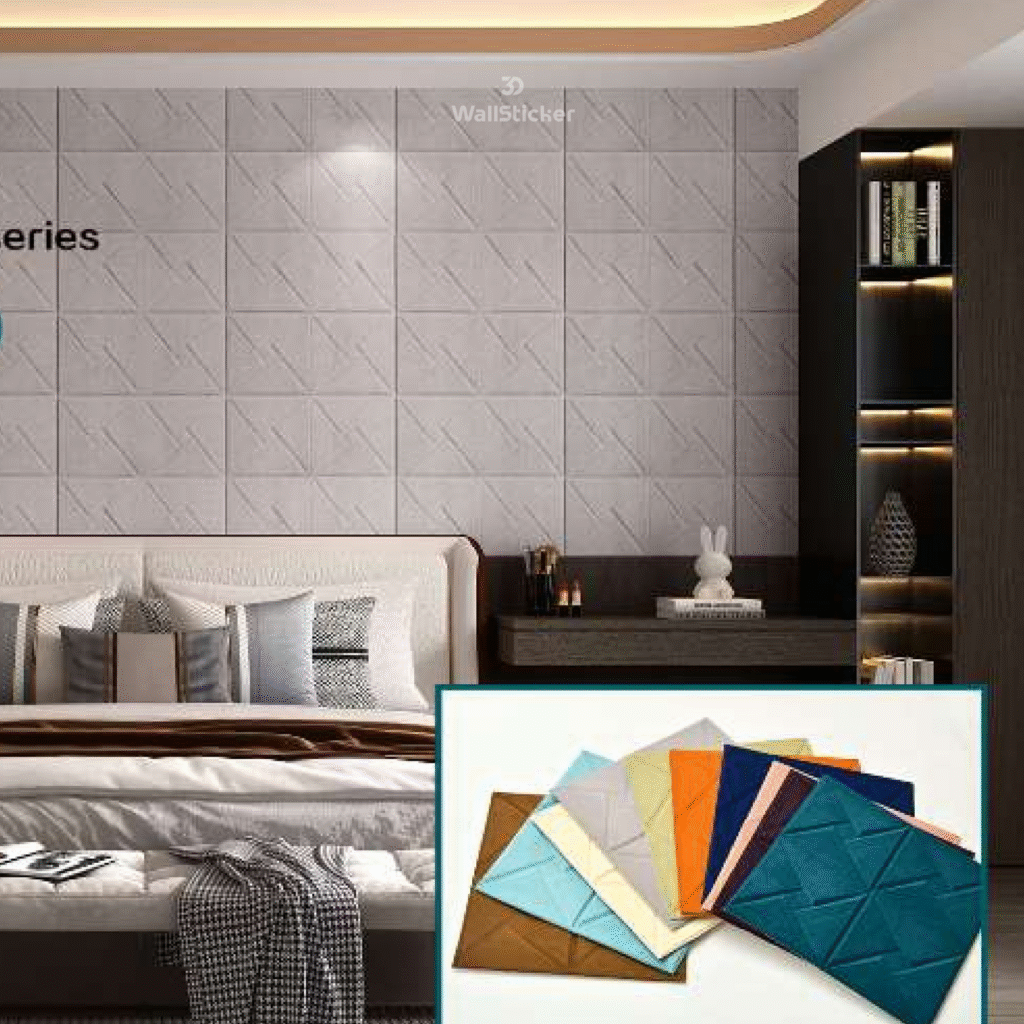
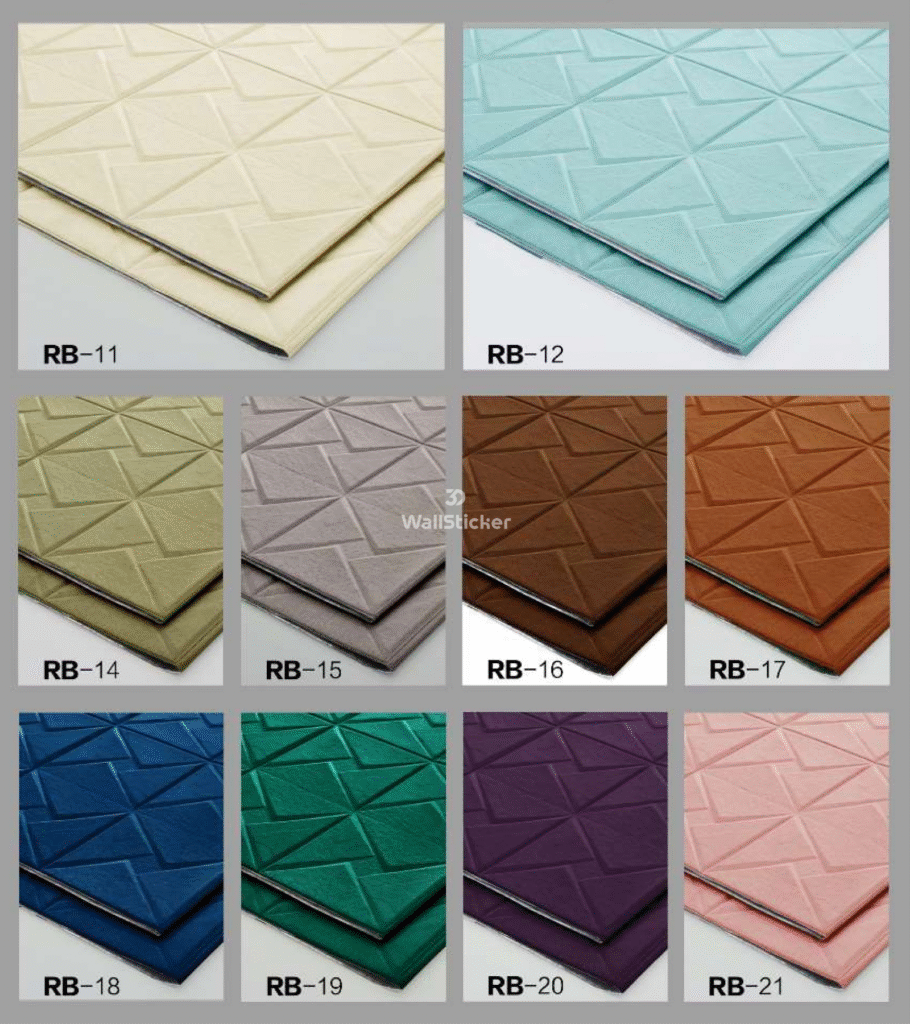
“We used the 3D velvet wall stickers for a commercial interior project, and the result was impressive. The panels are lightweight, easy to cut, and create a strong 3D effect. A great solution for fast renovation projects.”
Middle East (Project Contractor)
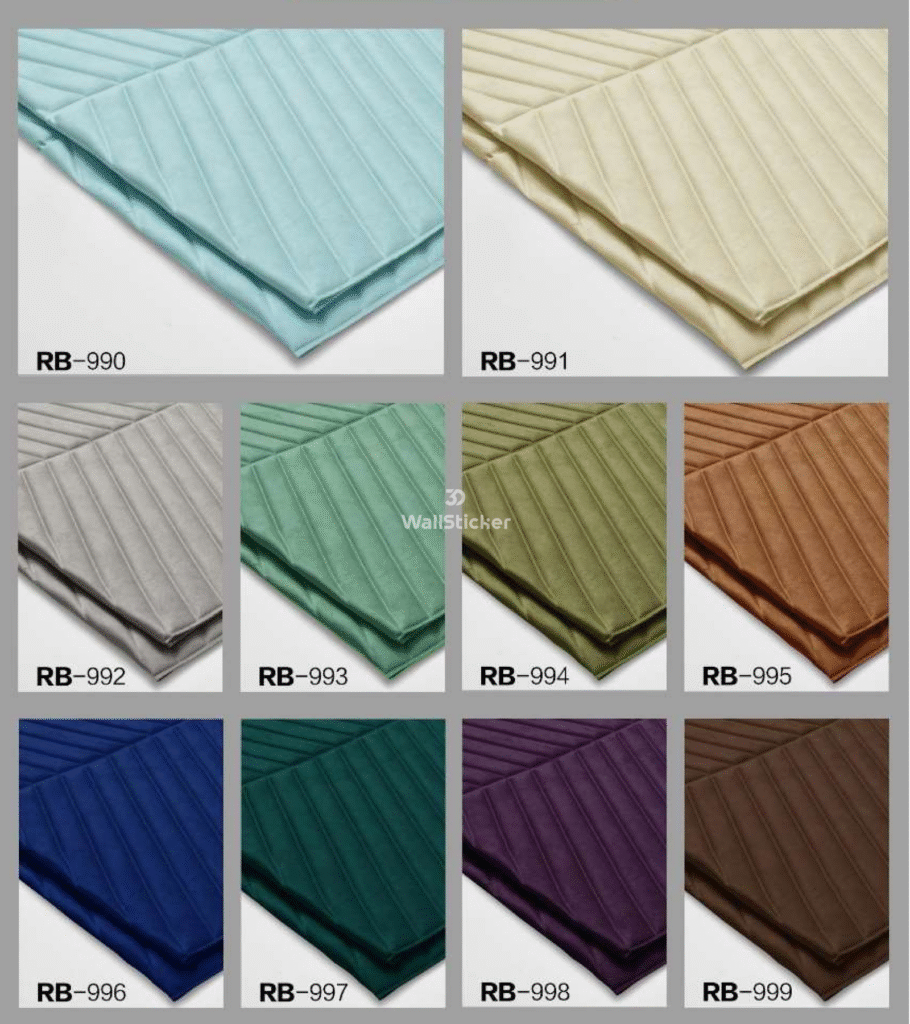
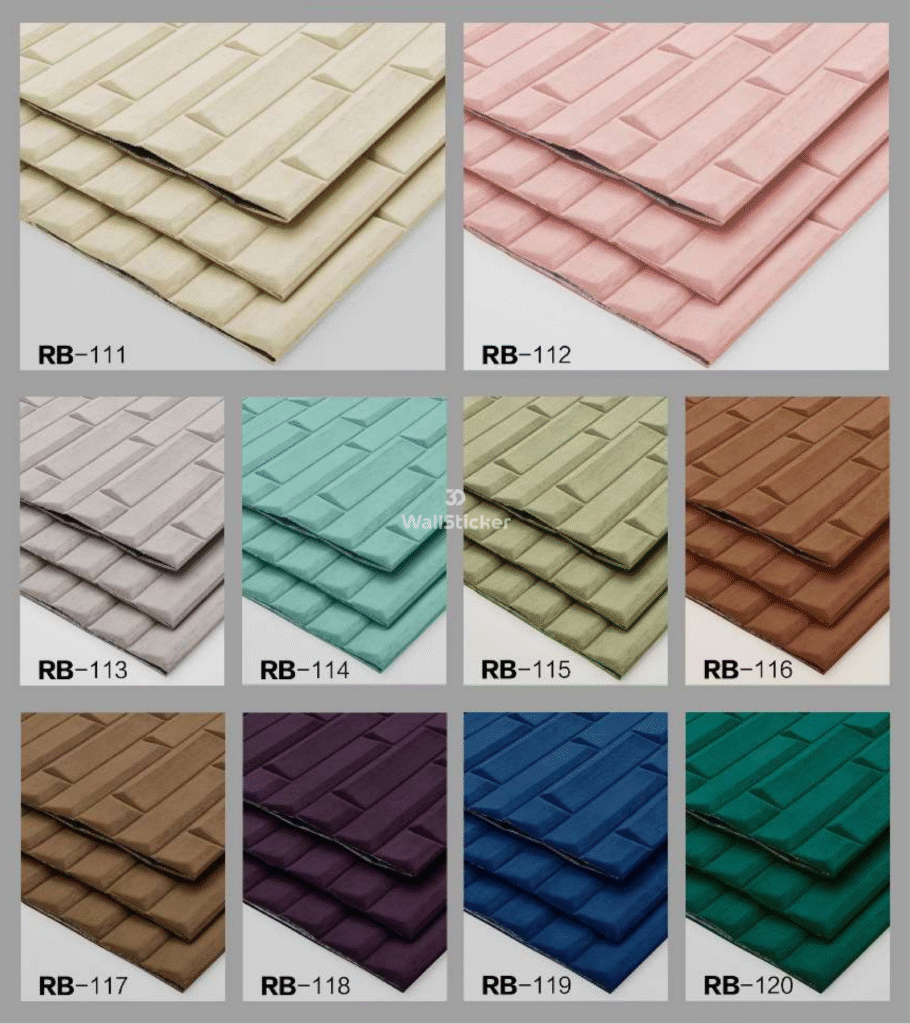
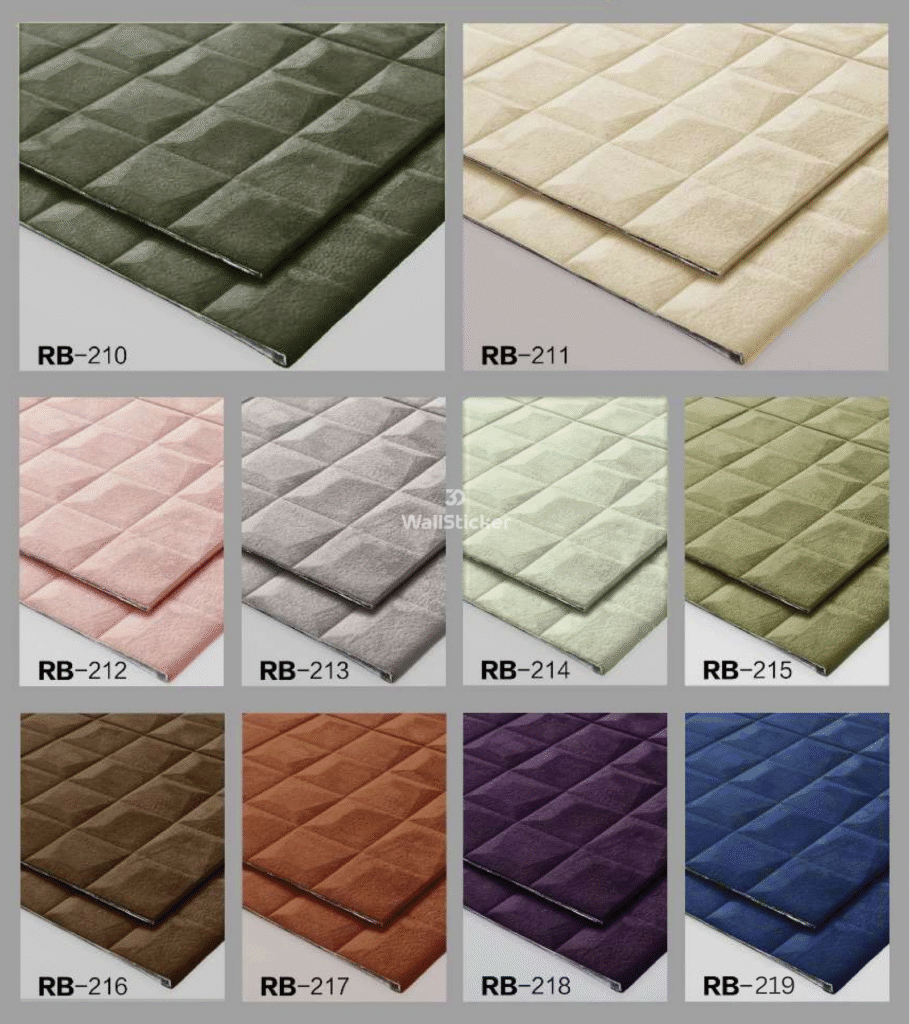
“These velvet wall stickers are very popular in our market. The self-adhesive backing is strong, the finish looks high-end, and the product is easy for DIY customers to install. Excellent quality and consistent supply.”
North America (Retail Buyer)

installation guide

4 steps to install Velvet Wall Sticker

Velvet wall stickers are self-adhesive decorative wall coverings, so installation is simple and DIY-friendly. Follow this professional method to get a smooth, luxury finish without bubbles or lifting.

Prepare the Wall (Most Important Step)

Wall must be:

Smooth and flat

Dry and dust-free

Oil-free and grease-free

Plan the Layout

Place the velvet stickers on the wall temporarily using masking tape.

Check alignment using a level.

Mark reference lines lightly with a pencil.

Peel the Backing Slowly

Start from the top corner.

Peel off only 5–10 cm (2–4 inches) of backing first.

Do NOT remove the entire backing at once.

Stick & Press Gradually

Attach the exposed adhesive area to the wall.

Slowly pull down the backing while pressing the panel.

Self-adhesive panels bond immediately and usually need no extra glue

Why Choose Us

What Sets Us Apart

Perfection Anytime

Lorem ipsum dolor sit amet, consectetur adipiscing elit. Ut elit tellus, luctus nec ullamcorper mattis, pulvinar dapibus leo.

24/7 Communication

Lorem ipsum dolor sit amet, consectetur adipiscing elit. Ut elit tellus, luctus nec ullamcorper mattis, pulvinar dapibus leo.

Our Fleet

Lorem ipsum dolor sit amet, consectetur adipiscing elit. Ut elit tellus, luctus nec ullamcorper mattis, pulvinar dapibus leo.

Emergency Help

Lorem ipsum dolor sit amet, consectetur adipiscing elit. Ut elit tellus, luctus nec ullamcorper mattis, pulvinar dapibus leo.

Advance Technology

Lorem ipsum dolor sit amet, consectetur adipiscing elit. Ut elit tellus, luctus nec ullamcorper mattis, pulvinar dapibus leo.

Licensed Officer

Lorem ipsum dolor sit amet, consectetur adipiscing elit. Ut elit tellus, luctus nec ullamcorper mattis, pulvinar dapibus leo.