
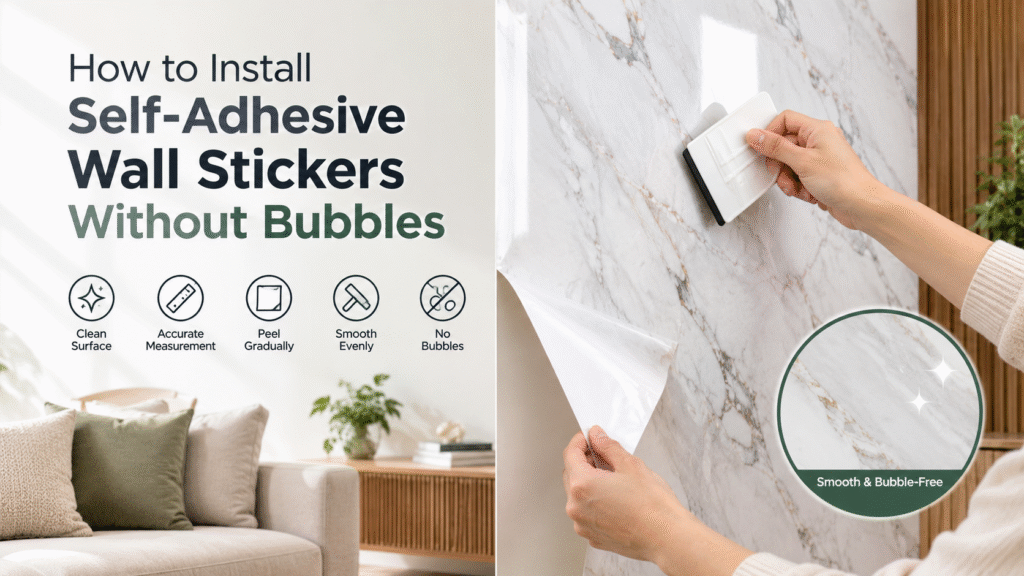
Self-adhesive wall stickers are designed to make wall decoration faster and easier. There is no need to prepare traditional wallpaper glue, and many products can be installed directly onto a suitable smooth wall.
However, one problem can quickly affect the final appearance: air bubbles.
Small bubbles, wrinkles, or uneven areas can make an otherwise beautiful wall sticker look poorly installed. The good news is that most bubbles can be prevented with the right preparation and installation technique.
In this guide, we explain how to install self-adhesive wall stickers without bubbles, what tools you need, why bubbles appear, and how to fix them if they occur.
Why Do Bubbles Appear Under Wall Stickers?
Before learning how to prevent bubbles, it helps to understand why they happen.
Common causes include:
- The wall is dusty or dirty
- The wall is uneven
- The material is applied too quickly
- Too much of the backing paper is removed at once
- Air becomes trapped underneath
- The sticker is stretched during installation
- The installer does not use enough pressure
- The adhesive does not make full contact with the wall
- The wall has moisture or grease
- The material is incorrectly aligned and repeatedly repositioned
In most cases, bubbles are caused by installation technique or wall preparation, rather than simply by the wall sticker itself.
What You Need Before Installation
You do not need a large collection of professional tools.
For most self-adhesive wall stickers, prepare:
- Measuring tape
- Pencil
- Ruler or straightedge
- Sharp utility knife
- Scissors
- Squeegee or smoothing tool
- Clean soft cloth
- Level
- Optional: hair dryer for certain flexible materials
Always follow the manufacturer’s recommended installation tools and methods, especially for products with special surface finishes.
Step 1: Make Sure the Wall Is Suitable
This is the most important step.
A self-adhesive wall sticker needs good contact with the wall.
The surface should generally be:
- Smooth
- Clean
- Dry
- Dust-free
- Grease-free
- Stable
- Free from loose paint
Avoid Installing Directly Over:
- Loose wallpaper
- Peeling paint
- Powdery surfaces
- Heavy dust
- Greasy walls
- Damp surfaces
- Severely uneven walls
If the wall is rough or damaged, repair and smooth it before installation.
Why Does This Matter?
Even if you install the sticker perfectly, an uneven wall can create:
Wall unevenness → incomplete contact → trapped air → bubbles
Good wall preparation is therefore the foundation of a bubble-free installation.
Step 2: Clean the Wall
Remove dust, dirt, grease, and other contaminants.
A clean, dry cloth may be sufficient for a relatively clean wall. For more contaminated surfaces, use an appropriate cleaning method and allow the wall to dry completely.
Do not install the sticker while the wall is still damp.
Important:
Clean + dry + smooth = better adhesive contact.
Step 3: Measure the Wall Carefully
Measure the installation area before cutting.
For large walls, check:
- Width
- Height
- Corners
- Doors
- Windows
- Electrical outlets
- Skirting boards
- Pattern direction
Add a small amount of extra material where trimming is required.
For patterned products, also check the pattern repeat.
This is particularly important for:
- Marble wall stickers
- Wood-grain wall stickers
- Linen wall stickers
- 3D grille wall stickers
- Geometric designs
Step 4: Plan the Installation
Do not immediately peel the entire backing paper.
First decide where the first piece will go.
For most projects, the first piece should be positioned carefully using a level or straightedge.
This is especially important for vertical patterns.
For example, with a 3D grille wall sticker, even a small angle at the beginning can become increasingly noticeable across the entire wall.
Remember:
A straight first piece makes the rest of the installation easier.
Step 5: Start From the Top
Place the material against the wall and check the alignment.
Then peel back only a small section of the release liner, usually from the top.
Do not expose the entire adhesive surface immediately.
This gives you more control.
Step 6: Apply the Sticker Slowly
This is the key technique for preventing bubbles.
Instead of removing the backing paper completely:
Peel → Press → Smooth → Peel → Press → Smooth
Work gradually from the top toward the bottom.
At the same time, use your squeegee or smoothing tool to push air toward the edges.
Avoid:
Peel everything → stick everything → try to remove bubbles afterward
This method makes bubble formation much more likely.
Step 7: Use a Squeegee Correctly
A squeegee helps create consistent pressure across the surface.
Hold it at a moderate angle and move it gradually across the material.
A useful technique is:
Center → Left → Center → Right
This encourages trapped air to move toward the edges.
For delicate decorative surfaces, place a clean soft cloth between the tool and the surface if recommended by the manufacturer.
Step 8: Do Not Stretch the Material
One common mistake is pulling the wall sticker too tightly during installation.
Stretching may make the material appear smooth temporarily, but it can create problems later.
The material may try to return to its original shape, potentially causing:
- Wrinkles
- Edge lifting
- Pattern distortion
- Adhesive stress
Instead, allow the material to lie naturally against the wall while applying it gradually.
Step 9: Pay Extra Attention to the Edges
Edges are common problem areas.
Press the material firmly along:
- Top edges
- Bottom edges
- Corners
- Seams
- Around outlets
- Around windows
- Around doors
Good edge adhesion can help prevent dust and moisture from getting underneath the material.
How to Install Wall Stickers Around Corners
Corners require additional care.
For an inside corner:
- Apply the material toward the corner.
- Press it carefully into the corner.
- Use a suitable smoothing tool.
- Make a clean cut where necessary.
- Press the edge firmly.
Do not force a large amount of material into a sharp corner if the product is not designed for that application.
For outside corners, cutting and joining may provide a cleaner result depending on the product.
How to Install Around Electrical Outlets
Before installation, turn off the appropriate electrical supply if required for safe access.
Then:
- Measure the outlet location.
- Transfer the measurements to the wall sticker.
- Apply the sticker over the area.
- Make a controlled opening.
- Trim carefully around the outlet.
Do not make the opening unnecessarily large.
A clean, close-fitting cut gives a more professional finish.
How to Fix Bubbles After Installation
Even with careful installation, a small bubble may occasionally appear.
The solution depends on the size and type of bubble.
Small Bubble
If the bubble is small:
- Gently press toward the nearest edge.
- Use a soft smoothing tool.
- Push the trapped air outward.
Do not press aggressively, particularly on textured or delicate surfaces.
Larger Bubble
For a larger bubble, gently lift the affected section if the adhesive allows repositioning.
Then:
- Lift the material slowly.
- Allow trapped air to escape.
- Reapply the material gradually.
- Smooth from the center outward.
Avoid repeatedly removing and reinstalling the same section because this can affect adhesive performance.
What If the Bubble Will Not Disappear?
If a bubble remains trapped after careful smoothing, some installers use a very fine pin to release the air.
However, this should only be considered when appropriate for the product.
A pinhole may be visible on:
- Glossy surfaces
- Metallic surfaces
- Printed surfaces
- Highly textured products
Always check the manufacturer’s recommended repair method first.
For premium decorative wall stickers, careful lifting and reapplication is generally preferable when possible.
Common Installation Mistakes
Mistake 1: Removing All the Backing Paper
This makes the material difficult to control.
Better: Remove the backing gradually.
Mistake 2: Installing on a Dirty Wall
Dust and grease can prevent the adhesive from contacting the wall properly.
Better: Clean and dry the wall first.
Mistake 3: Ignoring Wall Unevenness
A wall sticker cannot completely hide serious surface irregularities.
Better: Repair and smooth the wall before installation.
Mistake 4: Pulling the Material Too Hard
Stretching can cause distortion and future edge problems.
Better: Apply the material naturally and gradually.
Mistake 5: Working Too Fast
Speed is not always efficiency.
Trying to install a large piece quickly can create:
- Bubbles
- Wrinkles
- Misalignment
- Uneven seams
Better: Work section by section.
Mistake 6: Poor Pattern Alignment
This is especially noticeable with repeated designs.
Better: Check alignment before permanently applying each section.
Can Self-Adhesive Wall Stickers Be Installed by One Person?
It depends on the product size.
Small sheets or narrow rolls can often be handled by one person.
For large-format materials, two people can make installation significantly easier.
One person can control and align the material while the other gradually removes the backing paper.
This can be particularly helpful for:
- Large marble sheets
- Large fabric wall stickers
- Wide wall-covering rolls
- Large 3D grille designs
What Temperature Is Best for Installation?
Installation conditions depend on the specific adhesive system.
As a general principle, avoid installing self-adhesive wall stickers when the environment is extremely cold, extremely hot, or excessively humid.
The wall should be dry and within the temperature range recommended by the manufacturer.
For commercial products, suppliers should provide installation instructions specifying any temperature or environmental requirements.
Can You Install Wall Stickers on Textured Walls?
It depends on the degree of texture.
Smooth Wall
Usually the most suitable surface.
Light Texture
Some products may work, depending on the adhesive and material.
Heavy Texture
Adhesive contact may be insufficient.
Very Rough Wall
Usually requires surface preparation before installation.
A self-adhesive wall sticker is not designed to compensate for major wall defects.
How to Avoid Bubbles When Installing Different Types of Wall Stickers
Different materials may require slightly different handling.
Self-Adhesive Marble Wall Sticker
Pay particular attention to:
- Pattern alignment
- Large-sheet handling
- Smooth application
- Edge alignment
Linen Wall Sticker
Avoid excessive pressure if the surface has a delicate fabric-like texture.
PU Leather Wall Sticker
Apply gradually and avoid unnecessary stretching.
3D Grille Wall Sticker
Focus strongly on:
- Vertical alignment
- Pattern continuity
- Seam positioning
- Even pressure
Repeated lines can make installation errors particularly visible.
What Makes a Good Self-Adhesive Wall Sticker?
Installation performance is not determined only by the installer.
Product design also matters.
A well-developed self-adhesive wall sticker should consider:
Adhesive
The adhesive should be appropriate for the intended wall surfaces and application environment.
Backing
The backing should provide sufficient dimensional stability.
Flexibility
The material should be flexible enough for installation without becoming difficult to handle.
Surface Finish
The decorative layer should tolerate reasonable installation pressure without being easily damaged.
Release Liner
A suitable release liner should protect the adhesive before installation and allow controlled peeling.
For B2B buyers, these details are worth testing before placing a large order.
Tips for Importers and Distributors
If you sell self-adhesive wall stickers, installation problems can become customer-service problems.
Providing a simple installation guide can therefore add value to the product.
Consider including:
- Installation instructions
- Recommended wall conditions
- Cleaning instructions
- Product specifications
- Installation video
- QR code linking to installation instructions
- Sample pieces for testing
For private-label products, suppliers can also print installation instructions directly on the packaging.
This can reduce misunderstandings and improve the overall customer experience.
Quick Bubble-Free Installation Checklist
Before installation:
☐ Wall is smooth
☐ Wall is clean
☐ Wall is dry
☐ Dust and grease are removed
☐ Measurements are correct
☐ Pattern direction is checked
☐ Tools are ready
During installation:
☐ Start from the top
☐ Remove backing gradually
☐ Apply slowly
☐ Use a smoothing tool
☐ Push air toward the edges
☐ Avoid stretching
☐ Check alignment continuously
After installation:
☐ Check edges
☐ Check corners
☐ Check seams
☐ Remove small bubbles
☐ Trim excess material
☐ Inspect the entire wall
Frequently Asked Questions
Why does my self-adhesive wall sticker have bubbles?
The most common causes are trapped air, poor wall preparation, rapid installation, uneven walls, or insufficient adhesive contact.
Can bubbles disappear by themselves?
Small bubbles may sometimes become less noticeable, but it is better to remove trapped air during installation rather than rely on this.
Can I remove and reinstall a wall sticker?
Some products allow limited repositioning, particularly during initial installation. However, repeated removal can reduce adhesive performance. Always follow the product instructions.
Can I use a hair dryer to remove bubbles?
Heat can make certain materials more flexible, but it should only be used if recommended for that product. Excessive heat can damage some surfaces or adhesives.
Should I use glue in addition to the self-adhesive backing?
Do not automatically add additional glue. Whether extra adhesive is appropriate depends on the product and substrate. Follow the manufacturer’s installation instructions.
Can self-adhesive wall stickers hide an uneven wall?
They may conceal minor surface imperfections, but they are not a substitute for proper wall preparation. Significant unevenness can remain visible and affect adhesion.
Final Thoughts
Installing a self-adhesive wall sticker without bubbles is mainly about preparation, patience, and controlled application.
The three most important principles are simple:
Prepare the wall.
Peel gradually.
Smooth as you go.
Do not try to install a large piece by removing the entire backing paper at once. Work gradually, keep the material aligned, and use consistent pressure to push air toward the edges.
Whether you are installing a marble wall sticker, linen wall sticker, PU leather wall sticker, wood-effect sticker, or 3D grille wall sticker, the same basic principle applies: good preparation creates a better finish.
For wholesalers, distributors, and interior professionals, installation guidance should also be considered part of the product offering. A good wall sticker is not only about its appearance—it should also be supported by clear installation instructions and reliable technical information.
Explore the latest self-adhesive wall decoration products and installation-friendly designs from 3DWallSticker.